As the weather warms up for another hot Brisbane summer, you’ve probably considered how nice it would be to have a pool in your own backyard. With your own private swimming pool, you can take a dip when you please without having to brave the traffic and crowds that come with a trip to the beach or a public pool. You can also reap the benefits of full-body aerobic exercise at any time, and parties become even more fun.
A common question those who are fond of DIY ask is, “Can I dig my own pool?”
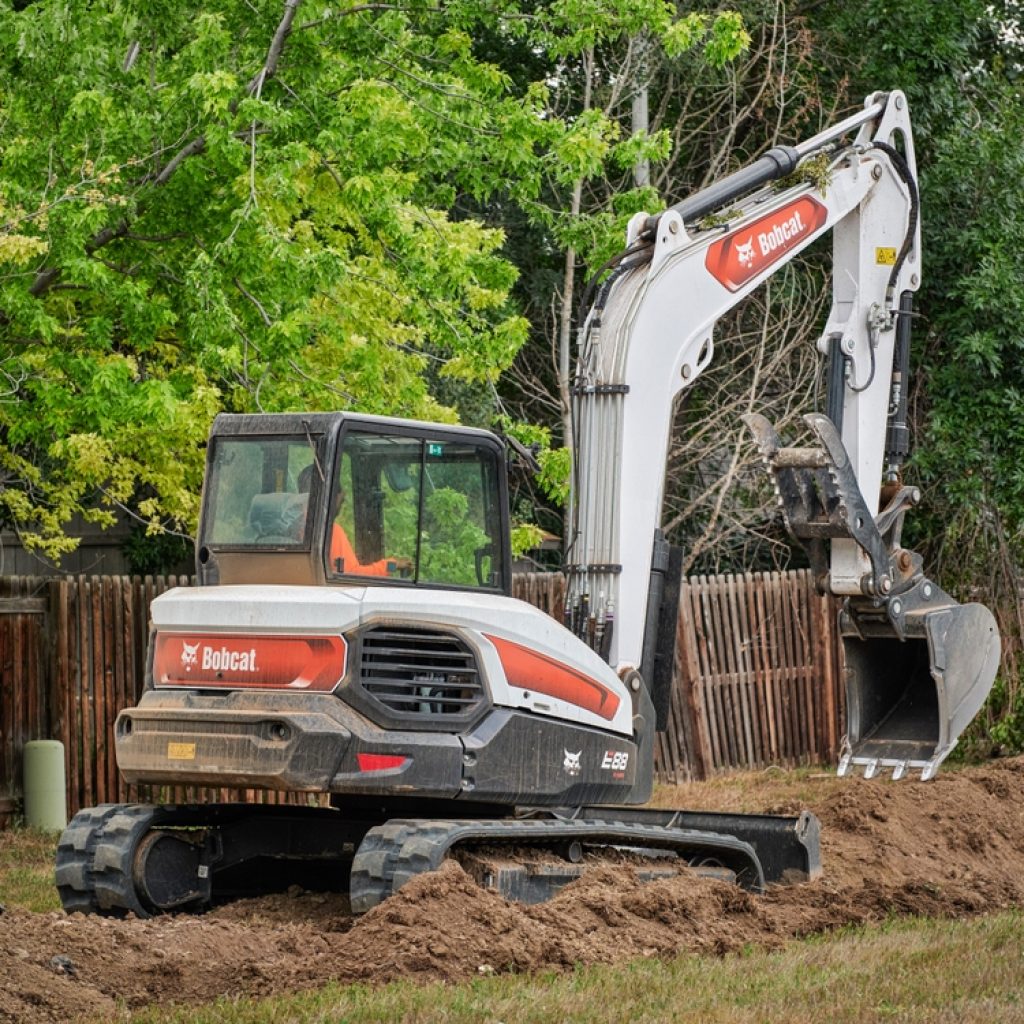
Many Australians are embracing DIY pool excavation. If you know what you’re doing (and what kind of pitfalls to avoid), it can be a highly cost-effective approach to building a backyard oasis ideally suited to your tastes. One piece of equipment that can make the process a lot easier for you is the mini excavator.
A mini excavator is a smaller version of the powerful earth-moving machine commonly used in industries such as construction. Compact enough to fit into tight spaces where large equipment won’t go, mini-excavators have a range of uses beyond shifting soil. You can also use them to remove rocks or old landscaping, backfill around the walls of the newly installed pool, or clear debris once the project is complete.
So, how much does it cost to dig a pool in Brisbane? And how do you stay safe while undertaking such a massive DIY project? Ryno Hire has the answers to all these questions and more in this guide to digging a pool with a mini excavator.
Choosing the Right Mini Excavator for the Job
Mini excavators typically range from 1-tonne excavators to 5.5-6.0 tonne models. DIY residential projects typically require much smaller generators than commercial construction projects.
A 1-tonne excavator can fit through an opening as narrow as 700mm, making it easy to manoeuvre around the sides of the house, and it’s ideal for landscaping or driveway digging.
1.7 – 2.0 tonne excavators are a little larger but still small enough to fit around most tight spaces. With zero swing capability, these excavators suit most kinds of jobs.
At the upper end of mini excavators, models with 5.5-6.0 horsepower are ideal if you need a little extra power.
For most residential backyard pools, a 1.5 to 3.0-tonne model more than gets the job done. But if you have specific questions about the style and size, and you’re wondering ‘which one can I dig my own pool with?’, the Ryno Hire team is happy to help.
Preparing Your Site: Clearing, Measuring, and Marking
Preparation is paramount for a safe and successful DIY pool project. Before you start, it’s essential to ensure your pool complies with building requirements and Australian standards, and to lodge a Brisbane City Council development application. From there, there are a few more critical preparatory steps:
Choose the right spot
Select a location with ample sunlight to maintain a safe water temperature and prevent algae growth. Keep it a safe distance away from electrical lines.
Calculate the measurements
You’ll need to calculate the full volume of soil that will need to be excavated, as well as the space required to maneuver the mini excavator around it. Use builder’s string to mark out the exact perimeter of your pool’s size, and extend the marked lines by a metre in all directions.
Clear the area
Remove any plants, rocks or other obstructions that may be in the way and check the area for any underground utilities. If in doubt, call Before You Dig Australia.
Essential Safety Tips Before You Start Digging
Can I dig my own pool? First, it’s essential to preserve the proper safety precautions. Digging a pool with a mini excavator is a dangerous business. Some safety tips to reduce your risks include:
Invest in training
If you have no prior experience in construction, excavation or plumbing, consider a training course or help from more experienced friends.
Work slowly and carefully
Avoid making any sudden movements with the boom or bucket. Keep the mini excavator clear of the edges to avoid causing a collapse. It’s tempting to complete a DIY project as quickly as possible, but a more relaxed approach leads to safer and more accurate results.
Use safety gear
Use personal protective equipment and other safety gear as needed. Safety glasses, ear protection, steel-toed boots and gloves are a good starting point.
Keep the machine on solid ground
Soft and wet soil can cause unstable working conditions.
Avoid over-excavating
It’s easy to dig deeper than you need to, especially when you’re working with powerful machines. However, this can destabilise your worksite and also take up unnecessary extra time. Check your depth measurements regularly to prevent overexcavation.
Step-by-Step Guide: Digging the Perfect Pool Hole
Once you’ve marked the layout and cleared the debris, here’s a step-by-step guide to the digging process:
Slowly excavate to the desired depth
Slowly dig layer by layer to prevent the sides from collapsing, and use the excavator to push the soil into piles that can be easily removed later. If you come across tough soil or roots in the way, use the bucket teeth on the excavator to break them up.
Maintain the slope
Pools require slopes for proper drainage. With a mini excavator, you can keep the slope even by adjusting the bucket’s angle.
Remove the excess soil
Pile the excavated soil into a designated area to be hauled away. If you have the space, you can use this soil later for landscaping.
Refine the edges and the base
After the excavation process, use the bucket edge of the excavator or a shovel to smooth out the base so it can stably support the pool.
The cost to dig a pool this way is influenced by certain factors, including the size of the pool and how long the project takes, with the cost of disposing of soil another factor. To be on the safe side, budget at least $5,000 to $8,000 for starters.
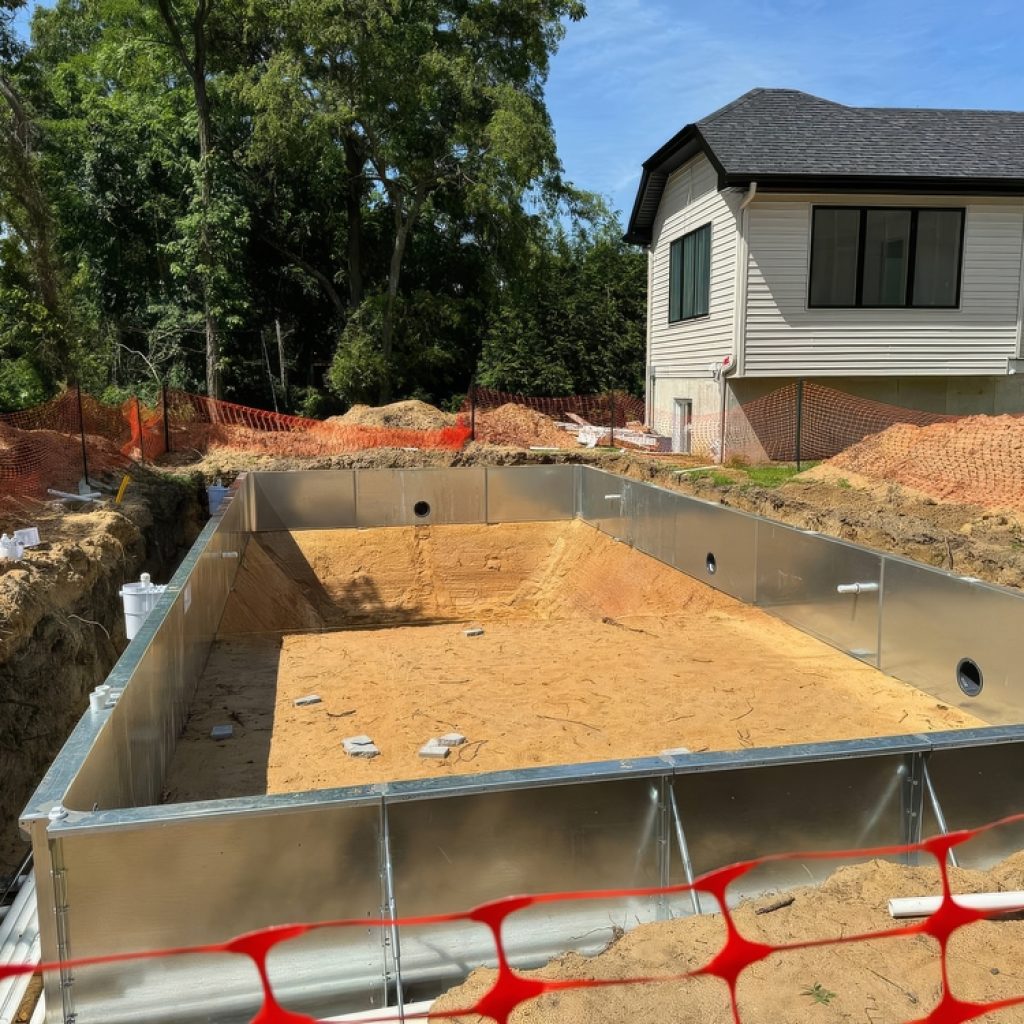
Post-Digging: What to Do After the Excavation is Complete
Once the excavation stage of the process is complete, it’s time to smooth out the edges of the hole for the next stage, which involves formwork and reinforcing steel. Clean the site to remove any dirt or debris and inspect the excavation for potential issues, such as instability. Once you’ve had the pool shell installed, you can use the mini excavator again to backfill soil around the exterior walls of the pool.
Dry Hire Machinery Available Over the Weekend with Ryno Hire
A local business with over a decade of earthmoving experience, Ryno Hire specialises in providing dry hire equipment for all your DIY needs. Dry hire allows you to borrow the equipment you require with only a valid Australian open driver’s licence for as long as you need to complete your project.
From Ryno Hire, you can hire DIY machinery, including several different sizes of dry hire mini excavators from 1-tonne to 8-tonne models, along with a range of attachments like buckets, auger drivers and hydraulic rock breakers. Hire for as little as one day or as long as a year, and save money by not having to pay for an operator. Ryno Hire offers you ultimate flexibility, first-rate customer service and no extra charges for insurance.
Contact Ryno Hire to get your dry hire quote and get started on your new DIY pool project immediately.